To Build or not to Build? A Look Into Starting a Project Build
Text and Photos by Marcel Venable
To Build or not to Build? A Look Into Starting a Project Build
All of us muscle car fans would love to restore original factory iron at some point in our life. But sometimes, the dream of throwing a coat of new paint and overhauling the engine is more than just a pipe dream involving an inflated budget.
So, the big question is at what point is a car to far-gone to restore, and how do you know when a car is worth your time and effort. There are some tools that will help you choose the right donor for your project, like the Filler Detective outlined in this month’s “Tool Guide.”
Once you have found a suitable donor, what are the steps to do it the right way the first time and save money? Not to fear, we have just the project in mind, and with a little time, effort and the expert advice from the professionals at R&R Blasting and Powder Coating in Riverside California, we will walk you through the proper prep for restoring original sheet metal.
Follow the steps that we took to restore this ’65 Mustang coupe that had seen better days.
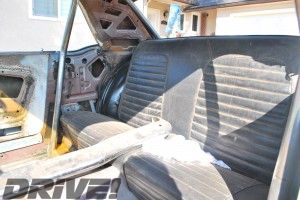
We purchased this coupe at a local car swap meet. It’s rough, but not too bad. Someone had plans to make it something special, because it already has a roll bar and modified fender flares. As far as the interior goes, the essentials are there and the floors are in pretty good shape. It’s a great foundation for $1,500.
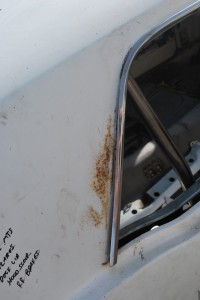
Hey, I said that it isn’t too bad, but it’s far from a cream puff, as evident by the looks of the rocker and rear sail-panel shown in these photos. The factory seam sealer is shot everywhere on the car and water has worked its way into everything.
The better part of the rest of the day is spent removing as much of the chrome trim as possible. It’s a good idea to lay everything out like this and take a photo to reference later if needed. Plus, a photo will help you identify items after they have come back from the refinisher.
We trailer our jewel over to R&R for the guys to get a good look at things. They let us know that the coupe is in pretty good shape.
Per R&R recommendations, we go with two different types of blasting media. The one on the left is walnut shell, which will be used on the top-facing panels like the hood and trunk lid. The media on the right is a medium-coarse sand mix that will be used to blast away heavy rust and most of the body filler.
It takes the guys a few hours to remove the layers of rust and paint off the sheet metal. Now we’re left with a fairly clean shell to restore back to its original glory.
Here’s an overall look at the front of the car, where you can see that most of it is still there! The front end looks as if someone in the past didn’t have the best depth perception and hit both fenders in the same place on both sides. But, hey, you can win them all.
Take a closer look at the difference between the two media and how they treated the sheet metal. On the left, the fender was blasted using the sand mix, while the hood was blasted using walnut shells. This is where the experience factors; the pros at R&R just saved us countless hours by using the proper media on the right surfaces.
More evidence of a job well done, the trunk and rear quarter panels look great and are ready to be treated for rust and primed to protect the raw metal from the elements. Stay tuned, we’ll show you that process next time.
R&R Sandblasting and Powder-Coating
12330 Doherty St.
Riverside, CA 92503
951.738.1516


