Step-by-Step: Improve an A-Body Suspension with GStreet Coil-Over Conversion (Part 2)
Text and Photos by Staff
Article
Part 1 of the step-by-step tutorial ended with the addition of VariShock shock absorbers. Read on to see how the A-Body suspension turned out!

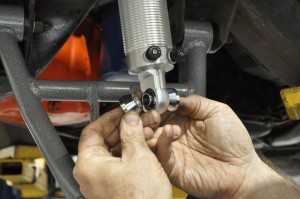
Initially, the shocks are installed without springs to allow the suspension to be raised and lowered freely to more easily check tire and wheel clearances. Here we insert the spherical shock stem into the factory mounting location.

The top side of the stem is secured with a large, heavy washer and 5/8-inch locknut. A small hex, just below the zerk fitting, enables use of a wrench to prevent the stem from turning while being tightened.
Spherical Stem Mount
The VariShock’s unique spherical stem mount enables precise suspension tuning. Materials used in traditional bushings can have some give. Suspension parts do move, making them a necessity, but the VariShock’s spherical stem mount eliminates compliant rubber or urethane bushings. The wedged steel mount base effectively captures and houses the spherical bearing of the stem, providing true and accurate adjustability. An easily accessible zerk fitting mounted at the tip of the stem injects grease directly onto the bearing contact surfaces, allowing the mechanism to pivot freely like it must.

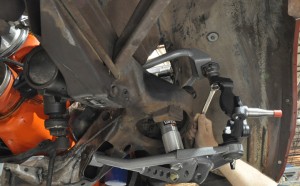
The lower mount needs a little wiggle room through the arc of travel, these misalignment spacers let the COM-8 bearings move a little more freely in the control arms where they mount.

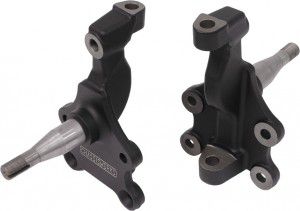
With the shock and control arms in place it’s starting to look like something. We’re ready to install our new Chassisworks 2-inch dropped “tall” spindles. We found out when installing the new spindle that our 1964 factory steering arm used 7/16-inch mounting bolts and would not fit with the later 1965-72-styled Chassisworks spindle. The heat-treated steering arm was too difficult to drill to the larger ½-inch holes, so we purchased a set of aftermarket ones.
Chassisworks Tall Dropped Spindle
A gym rat knows that when you are doing bench presses, the farther apart your arms are, the easier the bar is to move up and down. Suspension follows similar patterns when spindles are involved. Chris Alston Chassisworks uses a taller spindle than stock with its gStreet conversion to take advantage of the bench press analogy as well as other geometric shortcomings.
By placing the upper control arm at a steeper angle, there is gain in negative camber. When a car corners, the suspension compresses causing the top of the wheel carrying the most stress to tilt out naturally. Negative camber combats it by placing the top of the wheel farther inboard so as it travels out during cornering, the contact patch of the tire flattens out for better traction. Without negative camber, the contact patch starts out flat and the weight moves the stress to the outer corner of the tire, creating undesirable results like body roll and rolling over onto the side of the tire, also known as tire sidewall deflection.

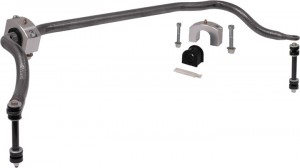
Chassisworks anti-roll bars use these nice, billet aluminum mounts with urethane bushings and greased zerks.

Keeping with the tech-looking mounts, the bar mounts at the factory location with socket-head bolts and lock washers.

The end links are assembled and mounted to the gStreet arm. We plan to drive this Chevelle to its handling limits, so we chose to go with Chassisworks fully adjustable bump steer tie rod ends.

At this point, the hub and wheel should be temporarily installed to check all clearances throughout full suspension and steering travel. Two inches is subtracted from the baseline ride height measurement taken earlier to compensate for the new dropped spindle. Here you can see the negative camber gain at full suspension compress as a result of the taller spindle.After everything checked out, the shocks were removed and the springs were installed. The upper spring seat has an open notch and simply slips between the spring and stem base.


