Enter Dale’s Cuda Shop, where Dale and his crew have been in business for more than 29 years offering quality Mopar reproduction parts for A, B, C and E bodies. After almost 30 years of reproducing the ’70-style muscle car parts, they have jumped into the late model Challengers with both feet.
The company currently offers stripe kits in multiple styles (with or without custom text), hood pin kits that are made in the USA, plus retro-style rear window louvers. DCS’ hood pin kits are made with newly engineered hood pin support brackets designed for correct placement of the hood pins, just like the ‘70s-style cars. Each kit is shipped complete with brackets, hood pins, clips and lanyards (which are 15 ½ inches for proper fit), faceplates, all of the mounting hardware and detailed instructions.
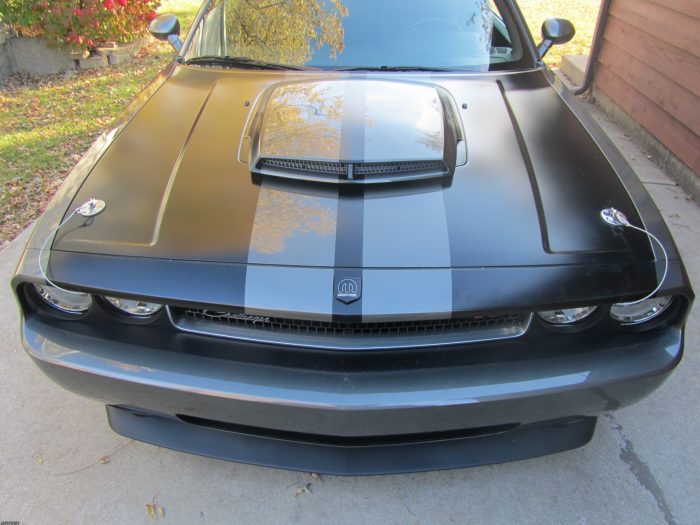
Follow along as we install a set of DCS’ new hood pins on our ‘10 Dodge Challenger

The hood pin kit from Dale’s Cuda Shop comes with everything you need to give your modern Challenger that old school look. We added a custom look to ours by painting the brackets and hardware Wrinkle Black.

Here’s what the hood looked like before we started. I love the Mopar T/A hood, but the look just isn’t complete without hood pins.


We started by positioning the brackets and checking clearances. Once we were satisfied, we attached the hood pins and bolted the brackets in place.


With the bracket in place we used a transfer punch to mark the fender and drilled out two holes.


Choosing not to cut the factory plastic per the directions, we taped the nut to a wrench and snaked our arms up and inside the fenders. Dodge even made this easier for us by designing the fuse panel on the passenger side to tilt up and out of the way. This may have made the job a little more difficult, but it was definitely worth it.


We used Teflon paste to mark the location of the hood pin on the hood so we’d have a clean, clear indication of where to start drilling. After all, you can only do this once.

Once the mark was transferred onto the hood, we used an automatic (spring loaded) center punch to mark where the should be drilled. NOTE: per the directions, do not drill in the center of the dot; you’ll need to move ¼-inch toward the outside of the hood.

The moment of truth.


We coated the top of the hood pin with Teflon paste to mark the top hole.


After using our automatic center punch to mark the location, we drilled a pilot hole and then dropped the hood down to make sure everything lined up. Be sure to use a center punch to keep the drill bit from jogging around on the soft aluminum of the hood.

A quick drop of the hood shows us we’re right on track, and we finished the job using a hole saw.


Next, we centered the cover plates on the hood pins and taped them in place. We used the transfer punch to line everything up and drilled the pilot holes for the trim screws.

For the final step, we positioned the first cable where we wanted it and screwed it in place. Then we transferred those measurements to the other side.
Moe’s Garage
1249 E. Burville Rd., Unit #3
Crete, IL 60417
Moesgarage.com
Dale’s Cuda Shop
22840 Buck Rd.
Alliance, OH 44601
330.821.5918
Dalescudashop.com