How to Replace Mustang Fender Sheet Metal (PART 1)
Text and Photos by Matt Emery
Article
We lived through the ‘70s. It was a weird time for many things (i.e.: bell bottom pants) and customizers were doing wild things, many for just plain odd reasons. But many good ideas (i.e.: hot pants) from then remain good today. The difference is how that idea is implemented. One of the hot ideas of the time was to put wide rear tires on the back of your car.
This remains popular today, but today the way to get that wide (and tall) tire look is to narrow the rearend and add wheels tubs. Back then, the way to do it was to add flares to the rear fenders and let that rubber hang out in the breeze. Usually made out of fiberglass, the flares were on everything from vans to muscle cars. This classic Mustang was one of these vehicles modified in such a way.
But the latest owner of this Mustang wanted to get back to the original look, so he called upon Bill Richman at RRC Fabrication And Speed in Upland, California, to take the ‘Stang out of the ‘70s and into the modern day. This was easy enough for Richman, who has more than 25 years experience with everything from hot rods and muscle cars to race cars. He would simply remove the entire rear panel and replace it with a new one that he got from Linero Mustangs. Linero also supplied the inner well steel after it was determined that the inner section was damaged beyond repair during the modification to the original. Richman came across Linero while perusing the aisles at the Long Beach Swap Meet.
This job sounds pretty straightforward: Cut off the offending piece and weld on the new panel. But there is much more to it than that, and Richman showed us a few tricks that he’s learned over the years. So follow along as this Mustang leaves the past behind.

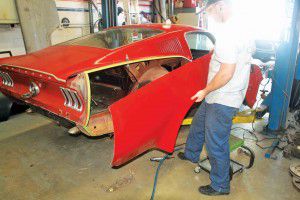
Times change, and fiberglass fender extensions covering 12-inch-wide Centerline wheels were cool once, but then again Corvette Summer was a long time ago.

We gotta give it up to whomever did the job all those years ago. The extension was actually done well, doesn’t look bad considering, and since there are no cracks or chunks falling off, has held up well.

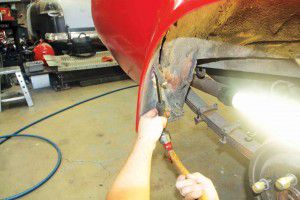
A cut-off wheel is used to make all of the straight line cuts. This is a job that requires patience, as the cut off wheel isn’t quick, but the idea is to make the cut with the least amount of damage to the surrounding sheet metal.

A pneumatic reciprocating saw is used when the body line curves. These things work great, but man, are they loud.
Stay tuned for the second part of this step-by-step tutorial!


