Hotchkis Front Suspension Package for Second Gen F-Bodies (PART 2)
Text and Photos by Staff
Article
In a recent post, we gave you some background on second generation F-body platforms in 1970. Our candidate for a quick reform was an ’80 Trans Am that was in great shape overall, but had three decades of neglect and wear and tear on the original suspension. Be sure to check out Part 1 for a few preliminary steps. Now take a look at the next steps of this transformation:
Let’s get straight into the installation. Check out the step-by-step process:

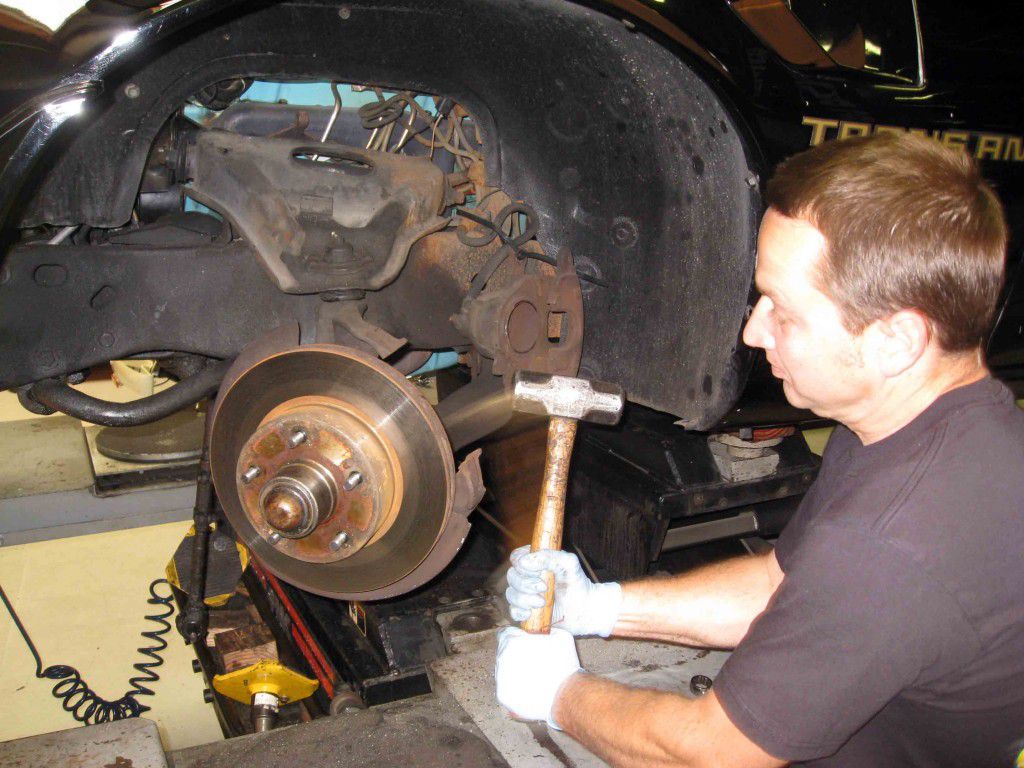
After loosening the upper ball and lower ball joint nuts, we again used a large hammer to separate them from the spindle. We left the nuts in place to protect the threads and provide a better striking surface.

With the ball joints loose, all of the force of the spring is now on the blocks below. To remove the spring, the lift below the lower control arm was slowly dropped until the arm was at full droop. A light nudge will remove it, but if yours is stubborn, light prying with a crow bar should do the trick.

With the brakes and suspension out of the way, we had easy access to the mounting bolts of the lower control arm. We used a wrench to hold the bolt while the nut was removed.

A few taps slid the control arm out, and close inspection of the bushings revealed excessive wear there, as well. Every part of this TA was flexing far more than it should.

Inside the engine bay, there are only two nuts that hold the upper control arm to the subframe. A ratchet with a universal joint attachment was used on the other side to hold the bolt in place.

Once we removed the bolts, the upper control arm was loose and we were finally ready to start putting on the good stuff.

A quick glance between the stock upper and the improved Hotchkis part immediately reveals another one of the biggest benefits, weight savings. The solid stamped steel part is significantly heavier than the tubular design.

Since the Hotchkis upper control arms are delivered complete, they just slide in place and the silver zinc-plated, 4130 chrom-moly offset billet cross-shaft are mounted with the stock hardware. The corrected geometry has -1.1 degree of camber, +5.2 degrees of caster built in.

For the sake of convenience, we decided to install the end links on the lower control arm prior to mounting. These links feature a Hiem joint at one end that greatly reduces biding and unwanted flex that compromise sway bar effectiveness.

Besides the aforementioned reduction in weight, Hotchkis’ 100 percent TIG welded 1.25-inch tubular steel construction also results in a stronger control arm that won’t distort under stress like the stamped stock one can. Increased structural rigidity is helped by the use of a CNC-machined inset spring cup.

To mount the arm, we used the lift to hold it up while sliding in the bolts. Make sure to clean any oil and grit out of the bushing pockets before mounting to protect the Delrin bushings. The geometry-corrected lower end gives us -0.6 degrees of camber, +2 degrees of caster.

