Everyday People: Installing Classic Performance Products Disc Brakes and Tubular A-arms
Text and Photos by Matt Emery
Everyday People: Installing Classic Performance Products Disc Brakes and Tubular A-arms
Even we found it hard to believe, but there are still some cars rolling around out there that don’t have adequate brakes. Take this ‘67 Camaro, for example. When it arrived at D&P Classic Chevrolet in Huntington Beach, California, the owner told Darryl Nance that he wanted his Chevy to stop and handle better, but that the car wasn’t a race car, just one that he wanted to cruise around town in.
Which leads us to what we call the “bigger pizza theory.” In an attempt at total disclosure, we have been known to say that the only thing better than pizza is a bigger pizza. But if there is only one or two of us eating, do we really need a 2-foot square pizza that has 24 pieces? No. The same can go for brakes. If the car is going to be used for competition, such as in major autocrossing or even club racing, then huge diameter rotors and multi-puck (and by multi we mean six) calipers are needed. But if the car is only going to used for everyday driving? Then that might not be the case.
This is where a system such as Classic Performance Products disc brakes, like those that will be installed on this Camaro, come into play. They call it the “Complete Front and Rear Disc Brake Kit” and it is. Included in the kit is everything necessary to install basic brakes that work well and fit well to a car that needs them without breaking the bank, and these brakes will still be able to fit behind 15-inch wheels. Make no mistake: all cars need disc brakes, at least up front. They also need a master cylinder that is designed to work with the new disc brakes, so a chromed CPP power brake booster kit was also included in this upgrade.
While he had the D&P crew at it, this owner also wanted tubular A-arms installed. Known as their Totally Tubular arms, the CPP upper and lower control arms are preassembled on new billet chrom-moly 4130 cross shafts and pivot sleeves. CPP exclusive pivot bushings are a patented self-lubricating plastic that will not squeak, and has a working temperature of over 400 F. The ball joints are included.
We were on hand at D&P Classic Chevy when they installed the CPP products onto this ‘67 Camaro. Known for their killer Tri-5 Chevys, D&P find themselves doing more muscle cars lately, and are well acquainted with the genre. This is a job that they can do in their sleep, and unless you have extensive knowledge of working with front springs and the internals of rearends. It is also job that those at home should consider having a shop like D&P do. Watch as this classic Chevy gets all that it needs to roll safely for another 40 years.
Classic Performance Products
175 E. Freedom Ave.
Anaheim, CA 92801
714.522.2000
www.classicperform.com
D&P Classic Chevrolet
18331 Enterprise Lane
Huntington Beach, CA 92648
714.375.0889
www.dpchevy.com
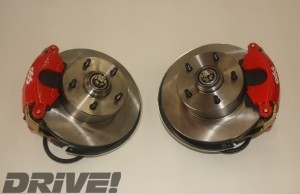
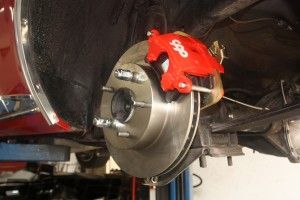
Providing safety along with a splash of color are the Classic Performance Products front disc brakes. CPP provides everything with the kit that is needed to install the brakes and turn the vintage Chevy into one that will stop quickly and safely.
Known as their Totally Tubular arms, the CPP upper and lower A-arms will give the Chevy much needed stability and modern bushings. Besides, they just look better than the stamped stock units, and are much lighter to boot!
As with the front units, the Classic Performance Products rear disc brake kit comes with everything that you will need to do the job right the first time.
Disc brakes require a properly valved master cylinder, so a chromed CPP power brake booster kit will also be installed.
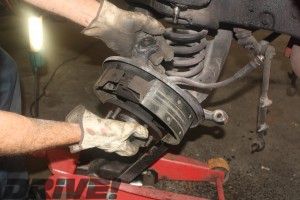
Unbelievably, this Camaro was still rolling on the stock drum brakes. This will soon change.
The first step is to remove the stock hardware. A few sharp raps with a single jack gets the ball joints loose.
A floor jack is used to carefully drop the lower A-arm to allow the spring to be removed.
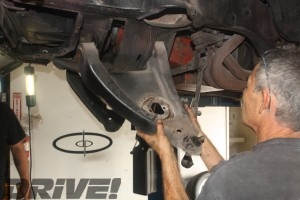
Once the hardware is out of the way, the lower A-arm is removed. The stock hardware was rusted in place, and removing it was the hardest part of the entire install.
Though the CPP bushings are “self-lubricating,” a little more grease on the bushings of the new CPP A-arms couldn’t hurt.
With a little more grease applied to the frame, the A-arms are installed using the new hardware supplied by CPP.
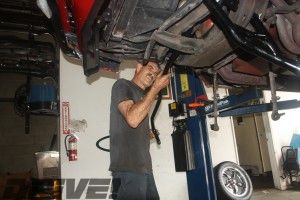
Getting the pivot bolt into the rear section requires a little work as the hole is inside the cross member. A short extension on the socket comes in handy here.
The CPP spindle/brake assembly comes assembled, but not painted. The pieces need to be pulled apart and the spindle and steering arm painted before installation. Well, they don’t have to be painted, but they won’t look so good, so D&P always takes the time to do it right.
A CPP sway bar is also part of the install. It is a big part of a car that handles well and should not be overlooked.
CPP supplies grease for the sway bar bushings, and with the grease in place, the bar is bolted into place using stock holes and supplied hardware.
With the paint dry, the spindle/disc brake assembly is installed. Getting the spring back into place is a dangerous process, and one that should handled by those with experience.
CPP supplies their calipers “loaded,” which means that they have the pads in place and ready to go.
Know that getting the sway bar end links properly installed requires some weight to be on the car, meaning that the car needs to be on the ground. After that the front end is done.
Installing the rear CPP disc brakes requires pulling the axles, so the differential needs to be drained. This is potentially a messy operation, but one trick is to leave the uppermost bolt loosely in place and to use a flat blade screwdriver to pop the seal along the lower edge. This will enable the fluid to drain without having to worry about the cover dropping off.
While the fluid is draining, the brake shoes are removed.
In order to get the backing plate off, the axles need to be pulled first. The bolts holding the backing plate on are removed.
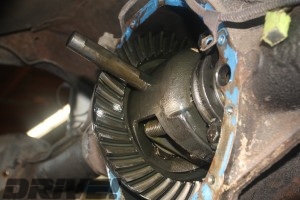
The axles are held in place with C-clips and a pin. By removing the set bolt, the pin can be slid out of the way.
When we say slid out of the way, we don’t mean removed entirely! Also, the rearend cannot be rotated too far or pieces of gears and shims will also fall out! Don’t say we didn’t warn you.
With the pin out of the way, the axles are pushed in and the C-clip is removed with a magnet.
With the clip removed, the axle can be pulled out and the stock backing plate removed.
The CPP brackets are bolted to the housing flange using the supplied hardware. With them in place, the axle is installed.
The CCP discs are installed and the residual machine oil is cleaned from them using lacquer thinner.
High temp grease is used on the pin holes of the calipers prior to installation.
With the caliper in place, the rear CPP disc brakes are nearly done, but they already look great.
CPP supplies hard lines and clamps for the rear brakes, so there is no trouble there, but they are a little long. Care is taken to bend them to fit.
Cables for the internal parking brakes are included. They are a little long, so routing them well is important to keep them smooth and out of the way of the exhaust system.
The last step is to install and plumb the new master cylinder. One trick is to measure the actuation rod of the old unit and adjust the rod on the new unit so that they are the same length. Note that the unit needs to be “bench bled” prior to installation or after it is in place.

